
Standard Eye-Level Hanging Height Guidelines
The rule of thumb for how-high-to-hang-wall-art centers on a single measurement: 57 inches. This standard represents the distance from the floor to the center of your artwork, positioning pieces at eye-level positioning where most people naturally look. Museums worldwide follow this principle to ensure visitors engage with art without strain. To apply this approach, use a measuring tape to determine the measuring height of piece, then divide the frame height division in half to find the center point. Mark 57 inches on your wall and align your artwork's center there. This method ensures no physical effort to view the piece, creating a comfortable viewing experience for everyone.
Artwork Sizing and Proportional Placement
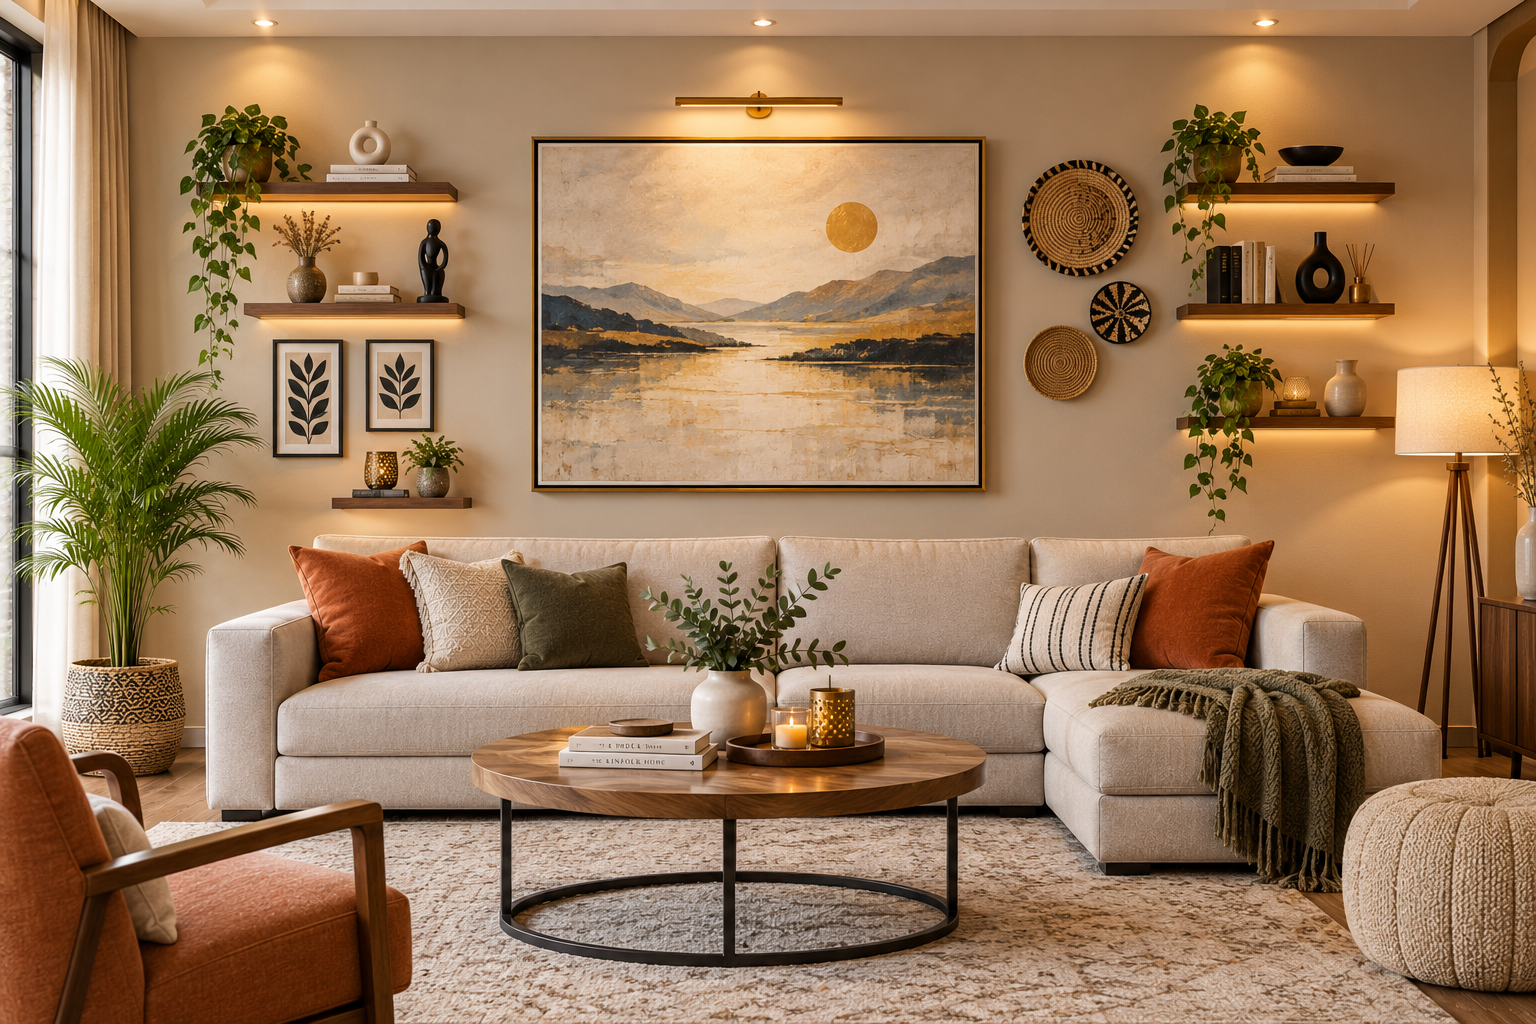
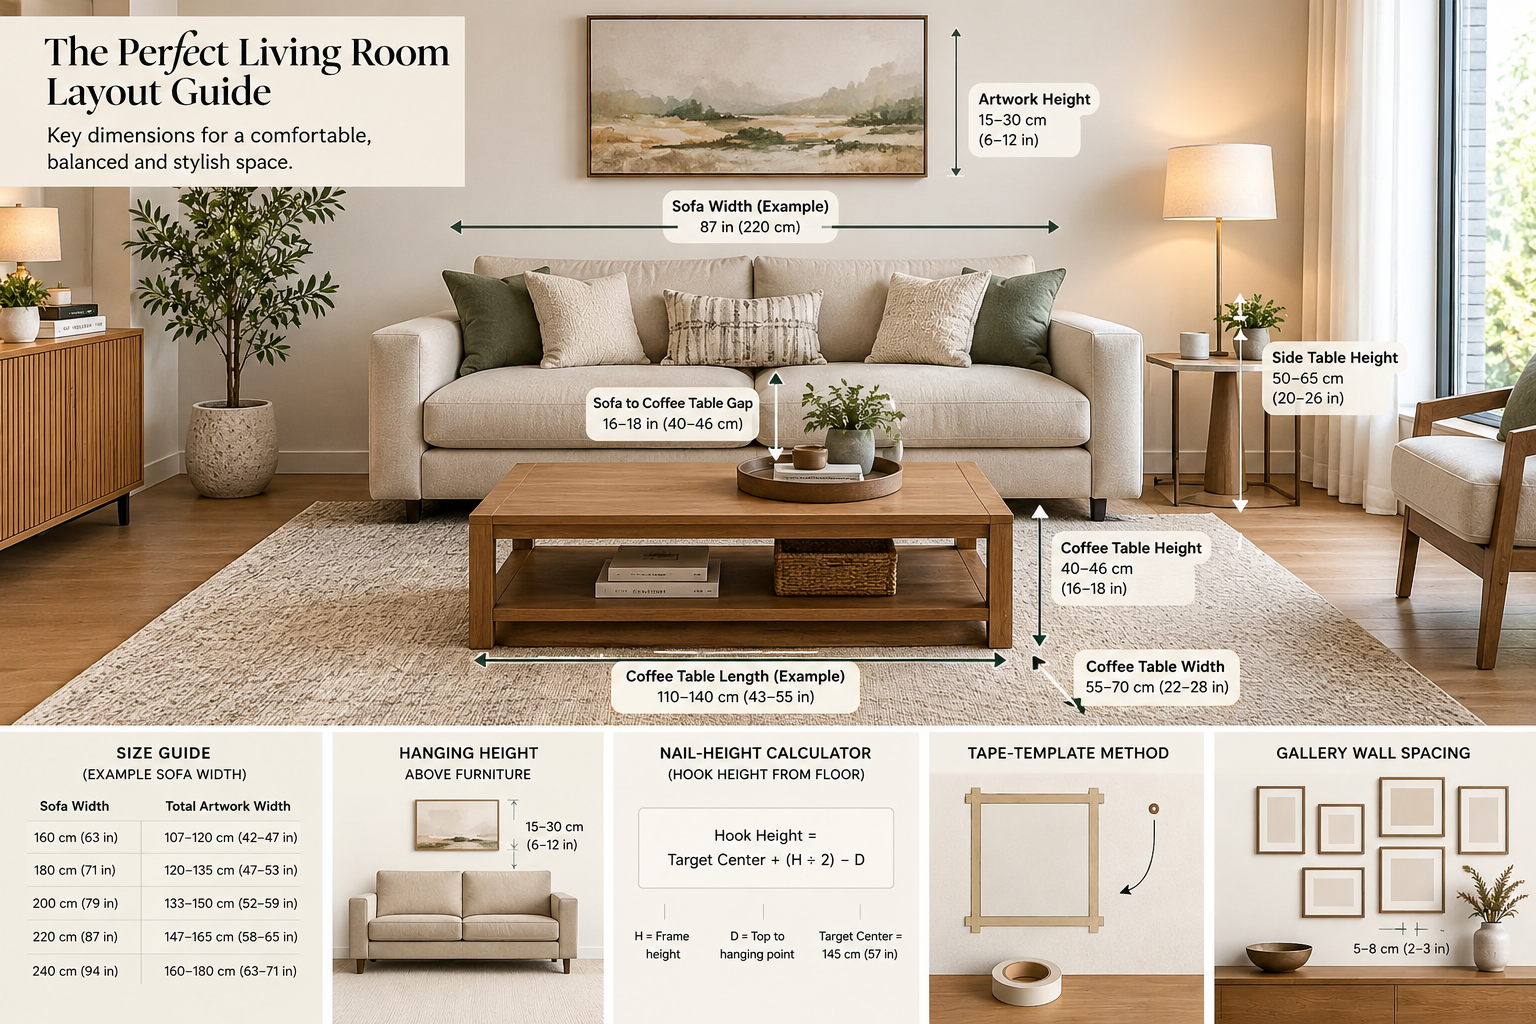
A practical approach to proportional sizing involves the width multiplication formula. Start by measuring furniture width beneath your artwork—this serves as your baseline measurement. Apply the 0.66 multiplier to determine ideal artwork dimensions. For example, with a 6 feet wide couch, multiply 72 inches by 0.66 to get approximately 48 inches for your piece's width. This furniture-relative sizing methodology ensures your wall art complements rather than overwhelms the space. Before purchasing, consider pre-ordering considerations for canvas prints and custom pieces, as lead times vary. Ordering early allows time for adjustments if the proportions don't match your expectations once you visualize the final placement.
Hanging Art Above Furniture
When hanging art above furniture, maintain proper clearance measurement between the piece and the surface below. The standard guideline calls for 7 to 10 inches of space, which provides visual balance and prevents the artwork from feeling cramped. For couch displays, this spacing creates an inviting arrangement that feels intentional rather than accidental. To determine placement, measure from the measuring furniture top upward to establish your starting point. In some situations, a tighter 6 to 8 inches range works better, particularly with lower furniture or smaller pieces. The key is ensuring adequate breathing room between art and furniture. Make furniture-specific adjustments based on your couch height and the artwork dimensions for optimal visual harmony.
Hanging Art in High-Ceiling Spaces
The standard 57 inches rule becomes an exception to standard rule when dealing with high ceilings. Rooms higher than nine feet require adjusted placement to avoid leaving excessive empty wall space. For tall rooms, use ceiling-relative measurement by measuring down from the ceiling rather than up from the floor. Apply proportional adjustment by raising base height incrementally—typically 10 to 15 inches higher than standard placement. Exceptionally high ceilings may warrant even greater increases. This approach ensures artwork remains visually connected to the room rather than appearing isolated in vast vertical space.
Creating and Hanging Gallery Walls
A gallery wall relies on the 57 inches vertical center principle as its foundation. This measurement guides placement of individual pieces within your arrangement. Choose between symmetrical layouts, which follow orderly patterns, or eclectic arrangements, which embrace varied sizes and spacing for visual interest. Alternatively, the one big piece concept offers simplicity by anchoring your wall with a single statement artwork. Before installation, develop a creating visual plan using paper templates or digital mockups. Use a ruler to establish center alignment calculation and consistent spacing distance between frames, ensuring your final arrangement feels intentional and balanced.
Hallway and Corridor Art Placement
Hallways present a unique scenario where the standard 57-inch rule becomes an exception to 57-inch rule. The standing view perspective in corridors differs significantly from typical living spaces. As people move through hallways, they experience standing and closer range experience, viewing artwork while upright and at shorter distances than in open rooms. This standing view perspective justifies raising artwork higher on the wall. The recommended range of 60 to 66 inches above the floor accounts for this dynamic viewing pattern. Consider the viewing distance consideration specific to your hallway width—narrower corridors may work at the lower end of this range, while wider passages benefit from the higher placement. Use a measuring tape to mark your chosen height and ensure consistent accounting for standing view throughout the space.
Practical Tools and Installation Methods
Successful artwork installation begins with the right essential hanging tools. A measuring tape and ruler form the foundation for measuring and marking your wall accurately. Mark your chosen height with a pencil, then use a level to ensure perfect alignment. For single pieces, hanging wire installation offers flexibility and security, distributing weight evenly across the frame. Alternatively, a sawtooth hanger application provides straightforward mounting directly to the wall. When deciding between DIY hanging with hanging wire and professional installation, consider your comfort level and artwork value. Heavy or valuable pieces often benefit from expert handling, while lighter frames work well for DIY approaches using these basic tools.
Design Principles and Visual Harmony
Visual balance calculation and visual flow form the foundation of effective artwork placement. When placing objects in balanced layout, consider how each piece relates to surrounding elements. Blending with décor requires understanding interior design theory—there is no absolute right way to arrange art, as personal preference and room characteristics vary. However, professional design standards emphasize symmetry principles for dispersing décor evenly across your wall. Whether you choose orderly arrangements or eclectic compositions, the goal remains consistent: create visual harmony that feels intentional and cohesive within your space.
Common Questions and Troubleshooting
The standard 57-65 inches range covers most hanging scenarios effectively. To find your ideal height, use center point calculation by measuring your artwork and dividing by two. For single pieces, placing central photograph at eye-level ensures comfortable viewing. When arranging multiple pictures, apply photo set alignment by treating the group as one unit and centering it at eye-level. Exception scenarios arise with multiple pictures on same wall—consider spacing, room proportions, and viewing distance. Hallways and high-ceiling rooms often require adjustments beyond standard guidelines. Use a measuring tape to verify heights before installation, ensuring your arrangement feels balanced and intentional throughout the space.